

In this post, I would like to share some thoughts that have helped me structure and enhance a pull request from the perspective of both the author and the reviewer. If you’re looking to create better pull requests, this post is for you.
While writing this post, I am thinking mostly of GitHub, but I am sure that my thoughts apply, with a bit of modification maybe, to other platforms, too.
So even if you are already the best on pull requests, maybe there is still room for improvement? 😅

Just kidding, I am sure you are doing great and I know this post will ignite excitement among those with more basic and advanced skills.
Screenshots for UI changes
Whenever I’ve found myself working on frontend features, I’ve seen that it can be tough to understand UI modifications by just reviewing markup. An experienced developer might be able to catch any peculiar HTML/CSS code usage, but understanding exactly what’s changed on the UI requires supernatural abilities. 🦸
(Have to say, it’s not a myth! I’ve met a developer with such skills! They truly exist out there!)
So what can you do to help improve the process? One way to help your reviewers do a better job is by including screenshots of the UI changes you made through your pull request, rather than letting them review only the code differences.
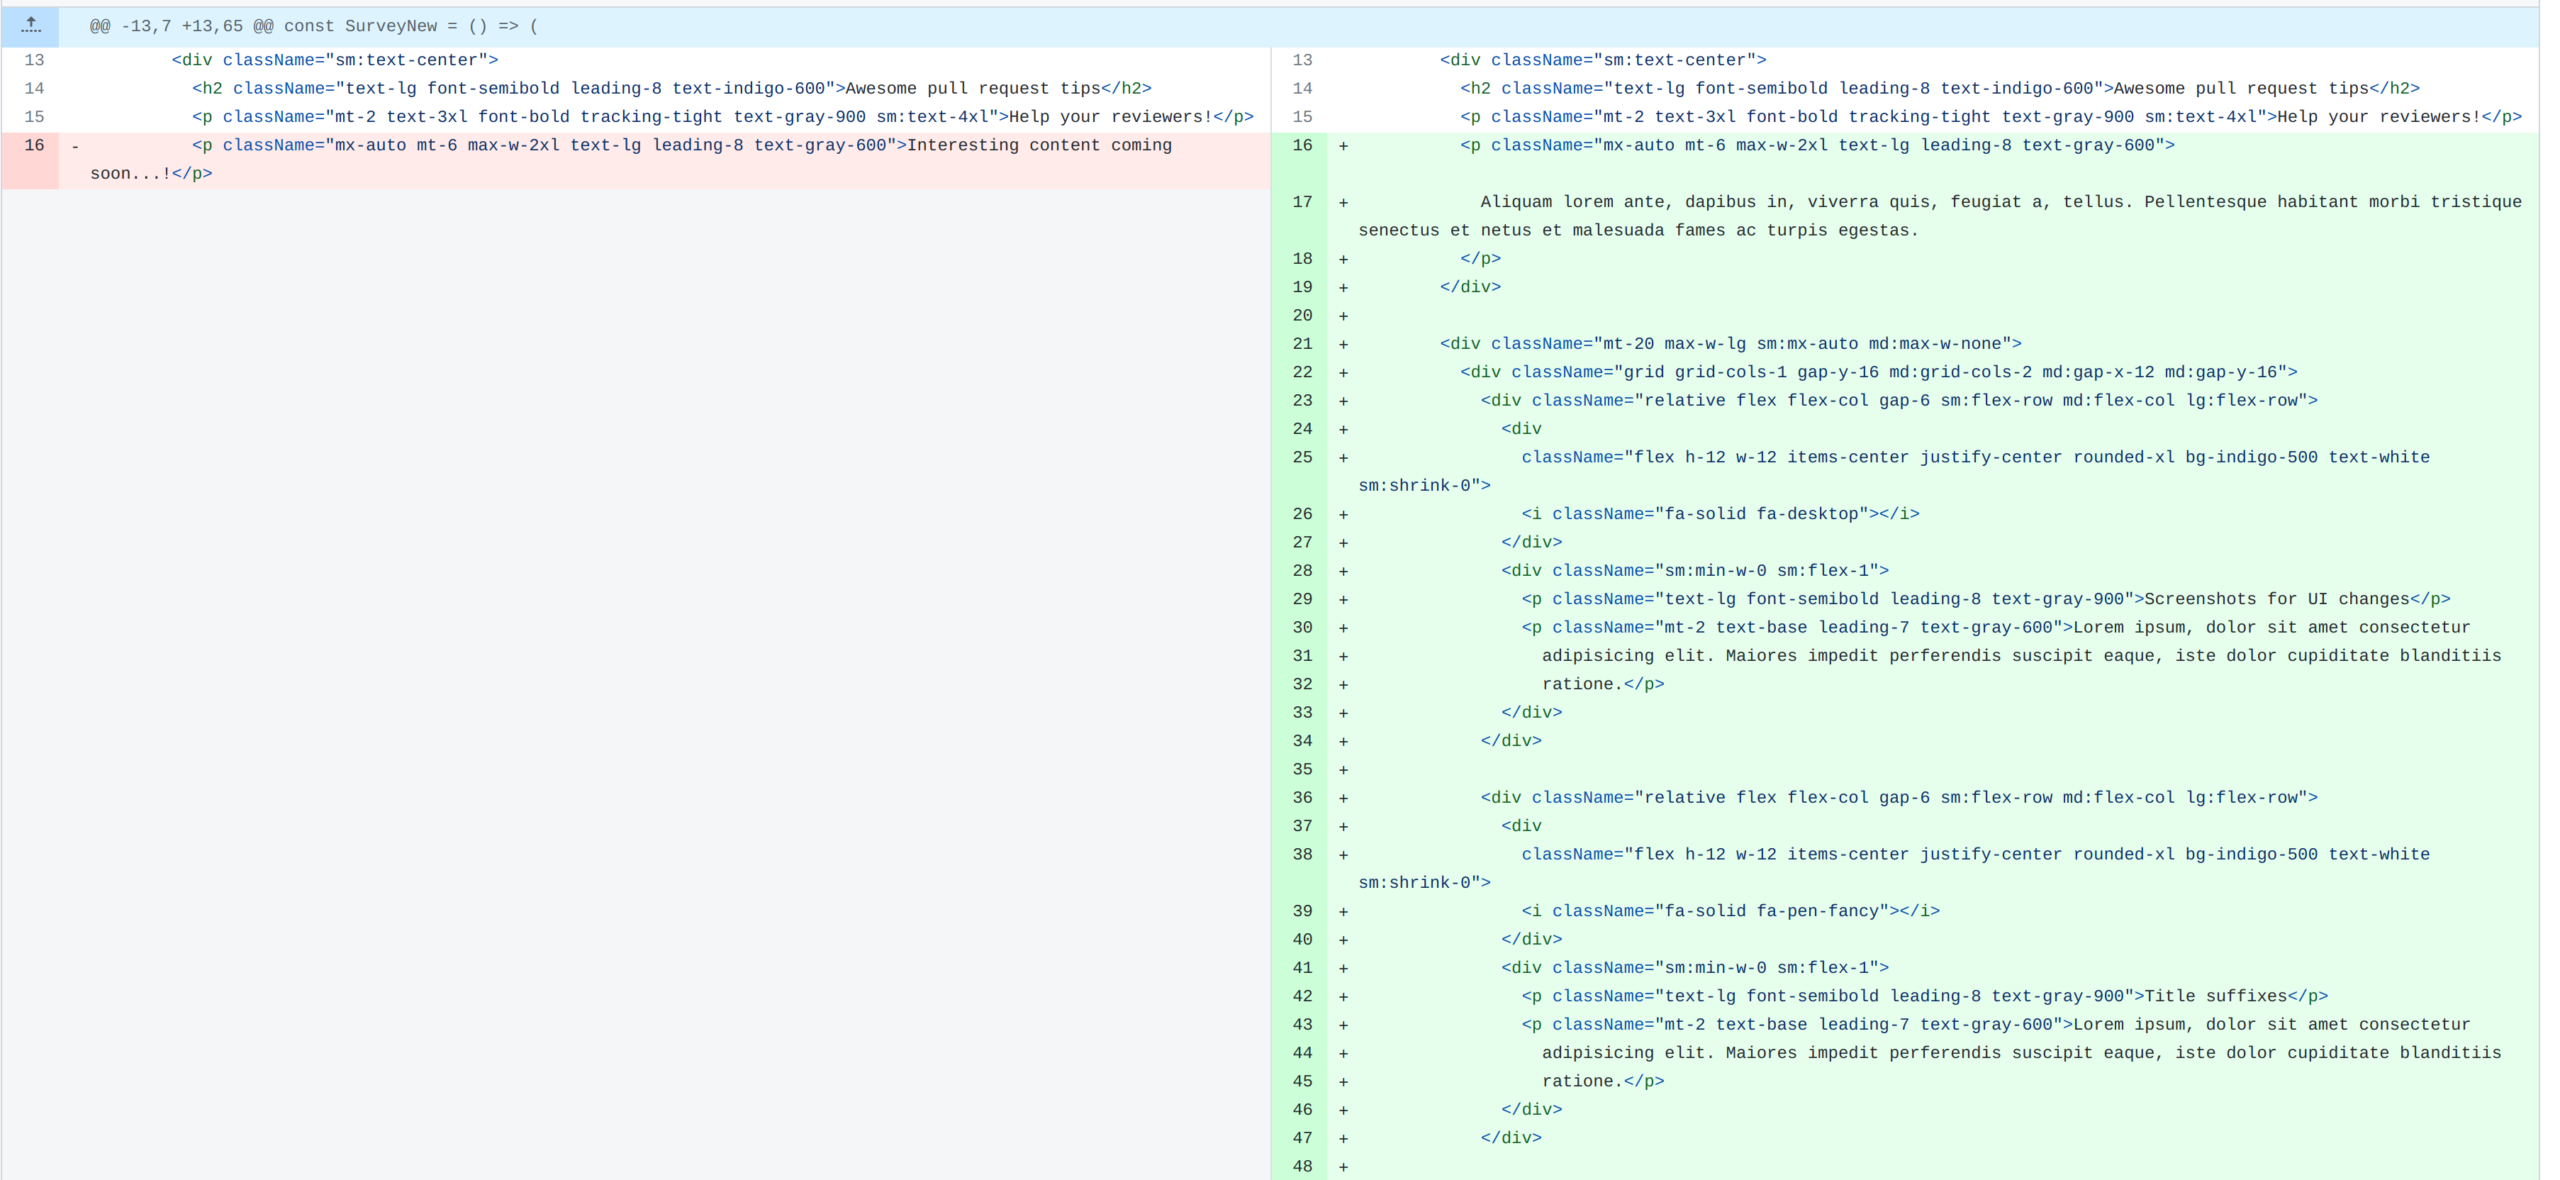
Think about it. Which one feels easier to understand? Seeing something like this:
Or review it with a screenshot attached, like this:
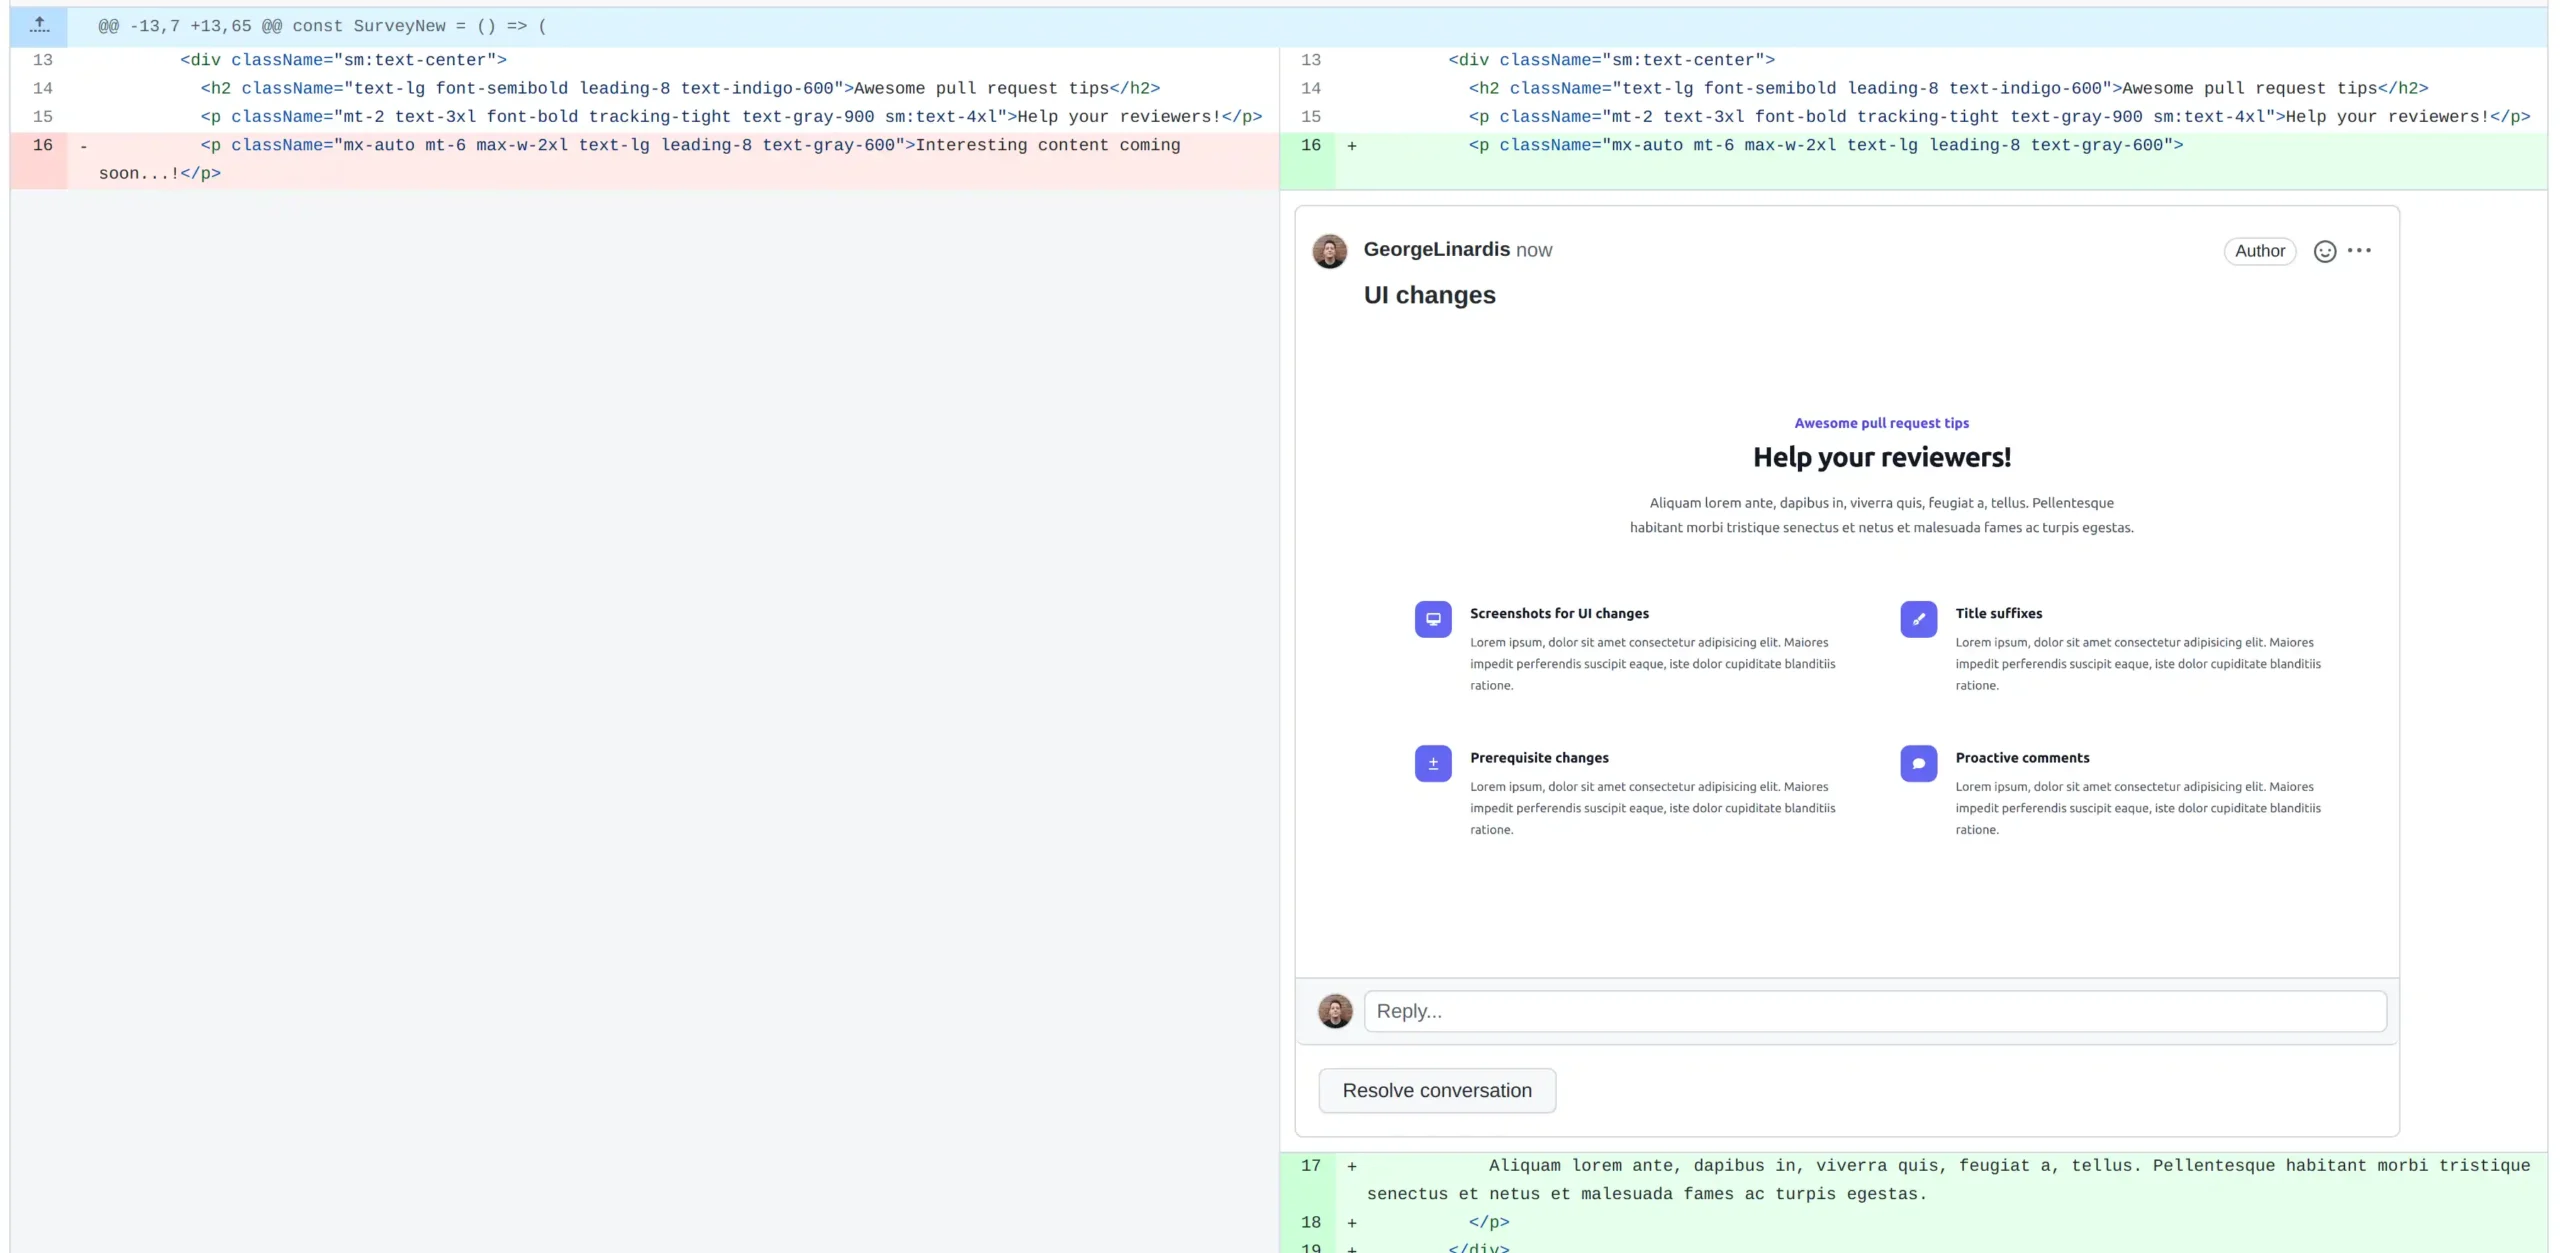
By adding screenshots, you can give your colleagues a clearer understanding of what you’ve implemented and, at the same time, increase the chances of catching a bug before it gets deployed! 🐛
Extra points 🧐
- Attaching an image to show how the UI looked before your tweaks, could also improve the review process. Something like before – after.
- Including mobile/tablet screenshots may also help in identifying a potential issue by seeing the UI changes for all devices, while QA testing.
QA testing (Quality Assurance), is a process that amongst others, includes, checking if a code change (feature/bug) was implemented correctly. This is often done by a QA engineer/tester. Some QA testing also takes place by the actual developers, implementing a feature, before they send it for review.
For minor UI changes adding screenshots is probably an overkill. I am sure your reviewers will be able to understand what’s changed without seeing an image. 😎
Proactive comments for better pull requests
Sometimes it can be difficult for me to understand if I have implemented something “correctly”. Especially when working on a large codebase, with many collaborators, it’s important to follow the agreed-upon coding guidelines.
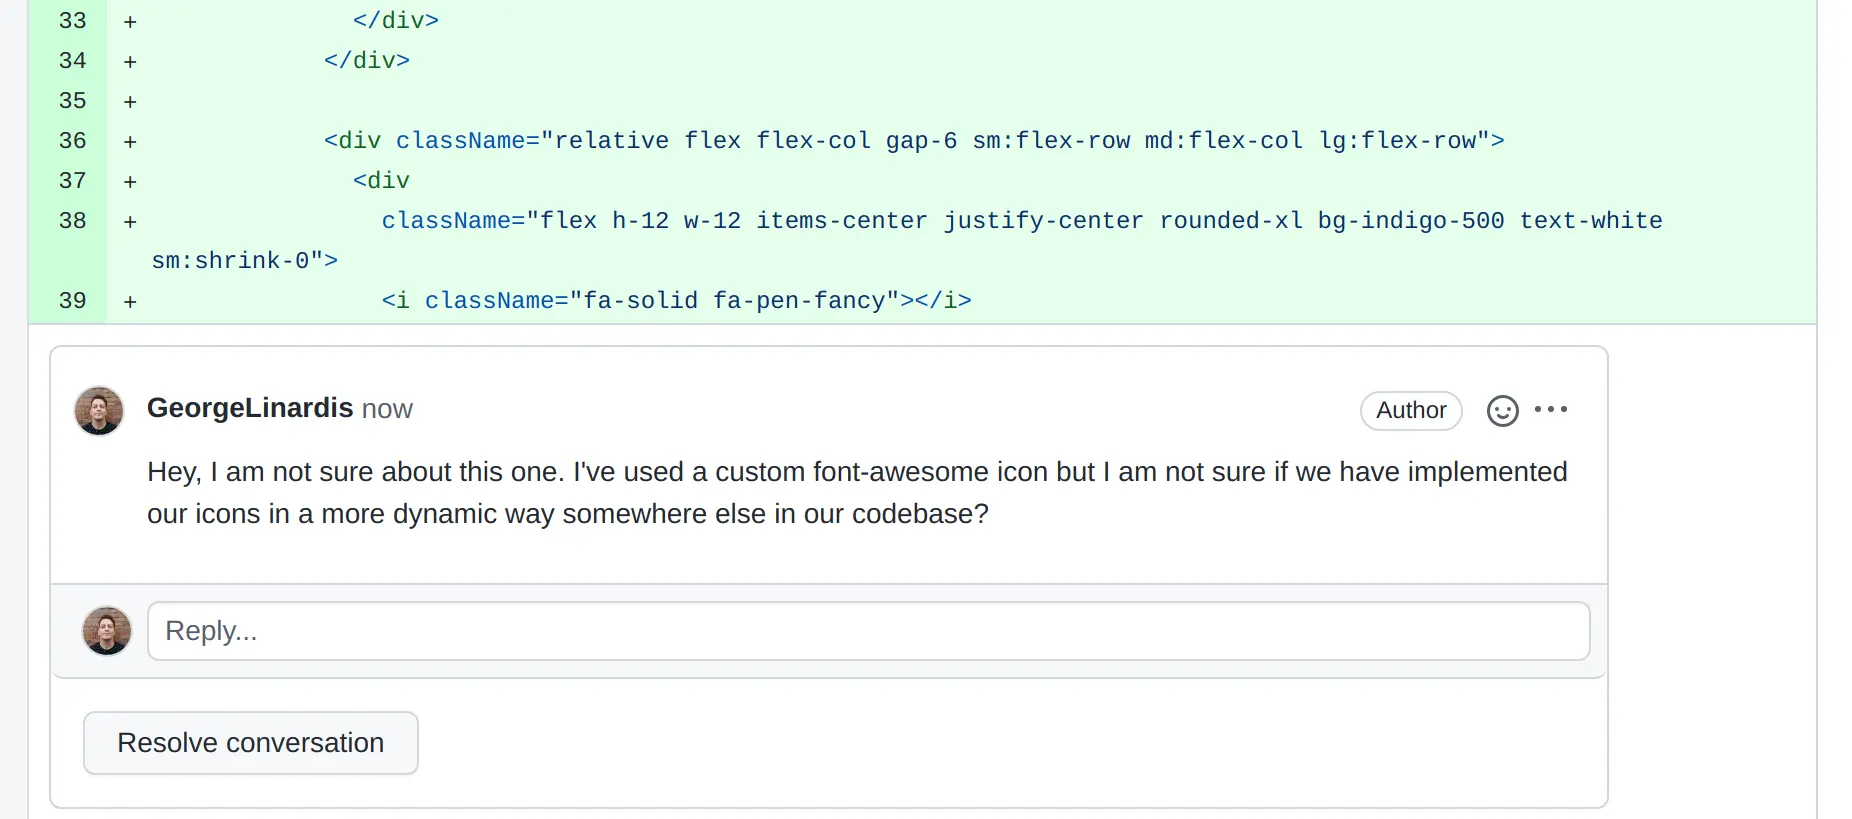
If you find yourself in a situation like this, don’t hesitate to ask for help by highlighting the pieces of code for which you don’t have much confidence. How? Simply by adding an emphasis comment. Just like adding a review comment in your own pull request, state your concerns so that your reviewers will pay extra attention, like this:
As a result, your reviewer will conduct a more thorough review of the code modifications, and as a result, you’ll feel more confident about your pull request when it finally gets deployed.
Improving the pull request title
One of my favorite ways to improve a pull request is by adding suffixes to the titles. So, for example, let’s consider the following title:

Although this is a nice pull request title, it still doesn’t provide answers, simply by checking the pr listing, to the following questions:
- What’s the branch this pr is merged into?
- What is the related issue?
Let’s try and see how we can improve it, by changing its structure a bit. Our goal is to be able to extract more concise information simply by looking at the pr title.
Adding the target branch
It’s common for projects to have some basic branches, apart from the main one (old master). These branches are usually for QA testing or client demos, client playgrounds, etc.
If you are working on a project like that, you might find yourself creating multiple requests per branch for various reasons. One pull request for QA testing, one pull request for the final deployment to the main branch, and so on.
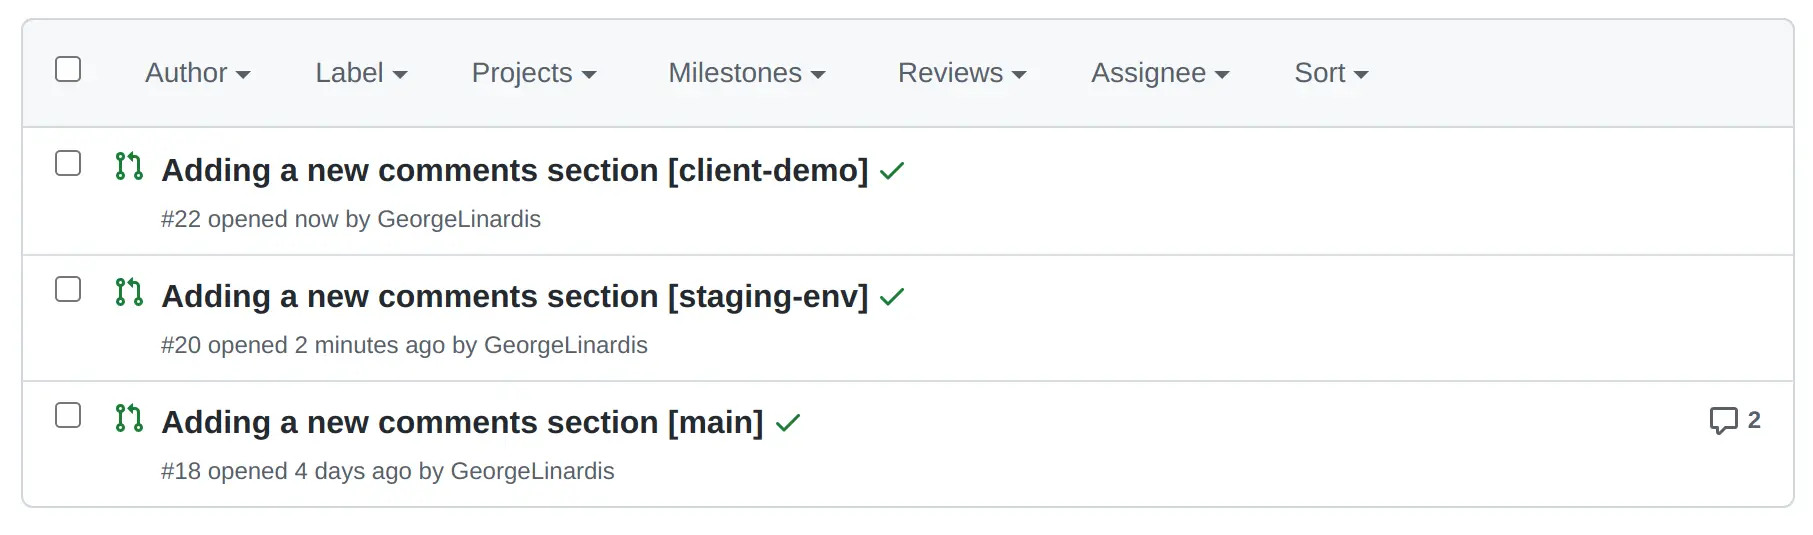
But if you do so, there is no way to identify the branch through the pr’s title, right? So what I prefer doing is just adding a simple suffix with the branch’s name. By doing so, if I have pull requests of the same feature to multiple branches it’s easier for me to understand what’s what.
Showing the related issue
Another interesting suffix that works perfectly for GitHub (and I assume in a similar way for other platforms too) is adding the issue number in your pr title.
(If you are using a workflow in which you create a GitHub issue before working on a new feature, then this is for you)
Let’s assume you have created a GitHub issue with the number #312. After deploying your changes to the last branch, you might find yourself going through the GitHub Issues list and trying to find the respective issue so that you can close it. Right?
Did you know there is a way to automatically close an issue when a pull request is merged? How? Well, it’s as simple as adding the Closes <Issue number> in the pull request’s title. So let’s say that for our pull requests, the Issue you have been working on is #312. If you change the last pull request title to something like:
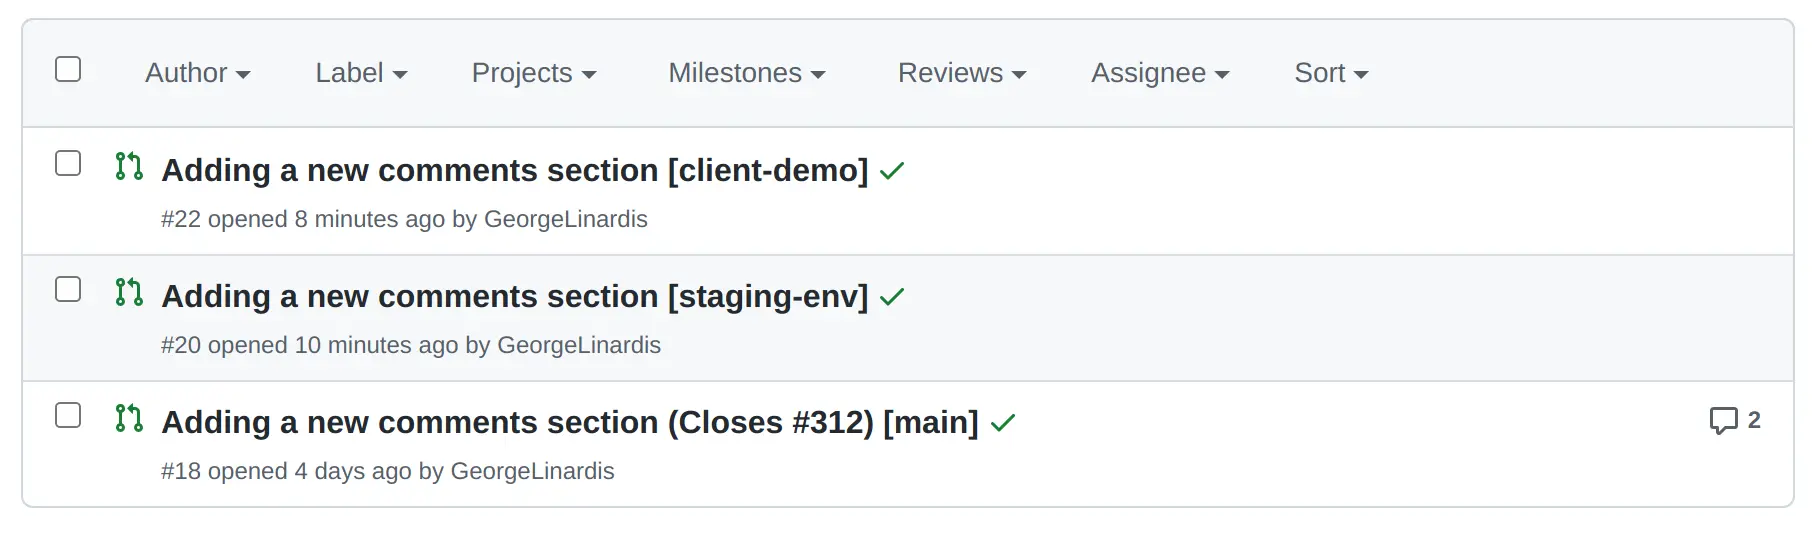
that means that when you merge the third pull request, issue 312, will also automatically close! Cool right?
Likewise, other suffixes that may be used to connect an issue with a pull request are:
- Fixes as in
Fixes #312 - Closes
- Resolves
Furthermore, there are several other resources available for you to explore in addition to the ones mentioned here; check the GitHub documentation for more.
If you found this post helpful, you may also want to check out our post on simplifying pull requests through prerequisite changes and helpful ways of splitting front VS back changes. This post explores how identifying and addressing necessary modifications before submitting your code for review can improve the code review process and increase your chances of success.
