
Greetings everyone! 😃 Today, our focus will be on addressing CSS selectors. These unique tools 🛠 are essential for targetting 🎯 specific HTML elements and controlling their appearance using CSS. Utilizing CSS selectors enables us to apply styles to those chosen elements which simplify and organize our code as well as improve the presentation and display of our websites.
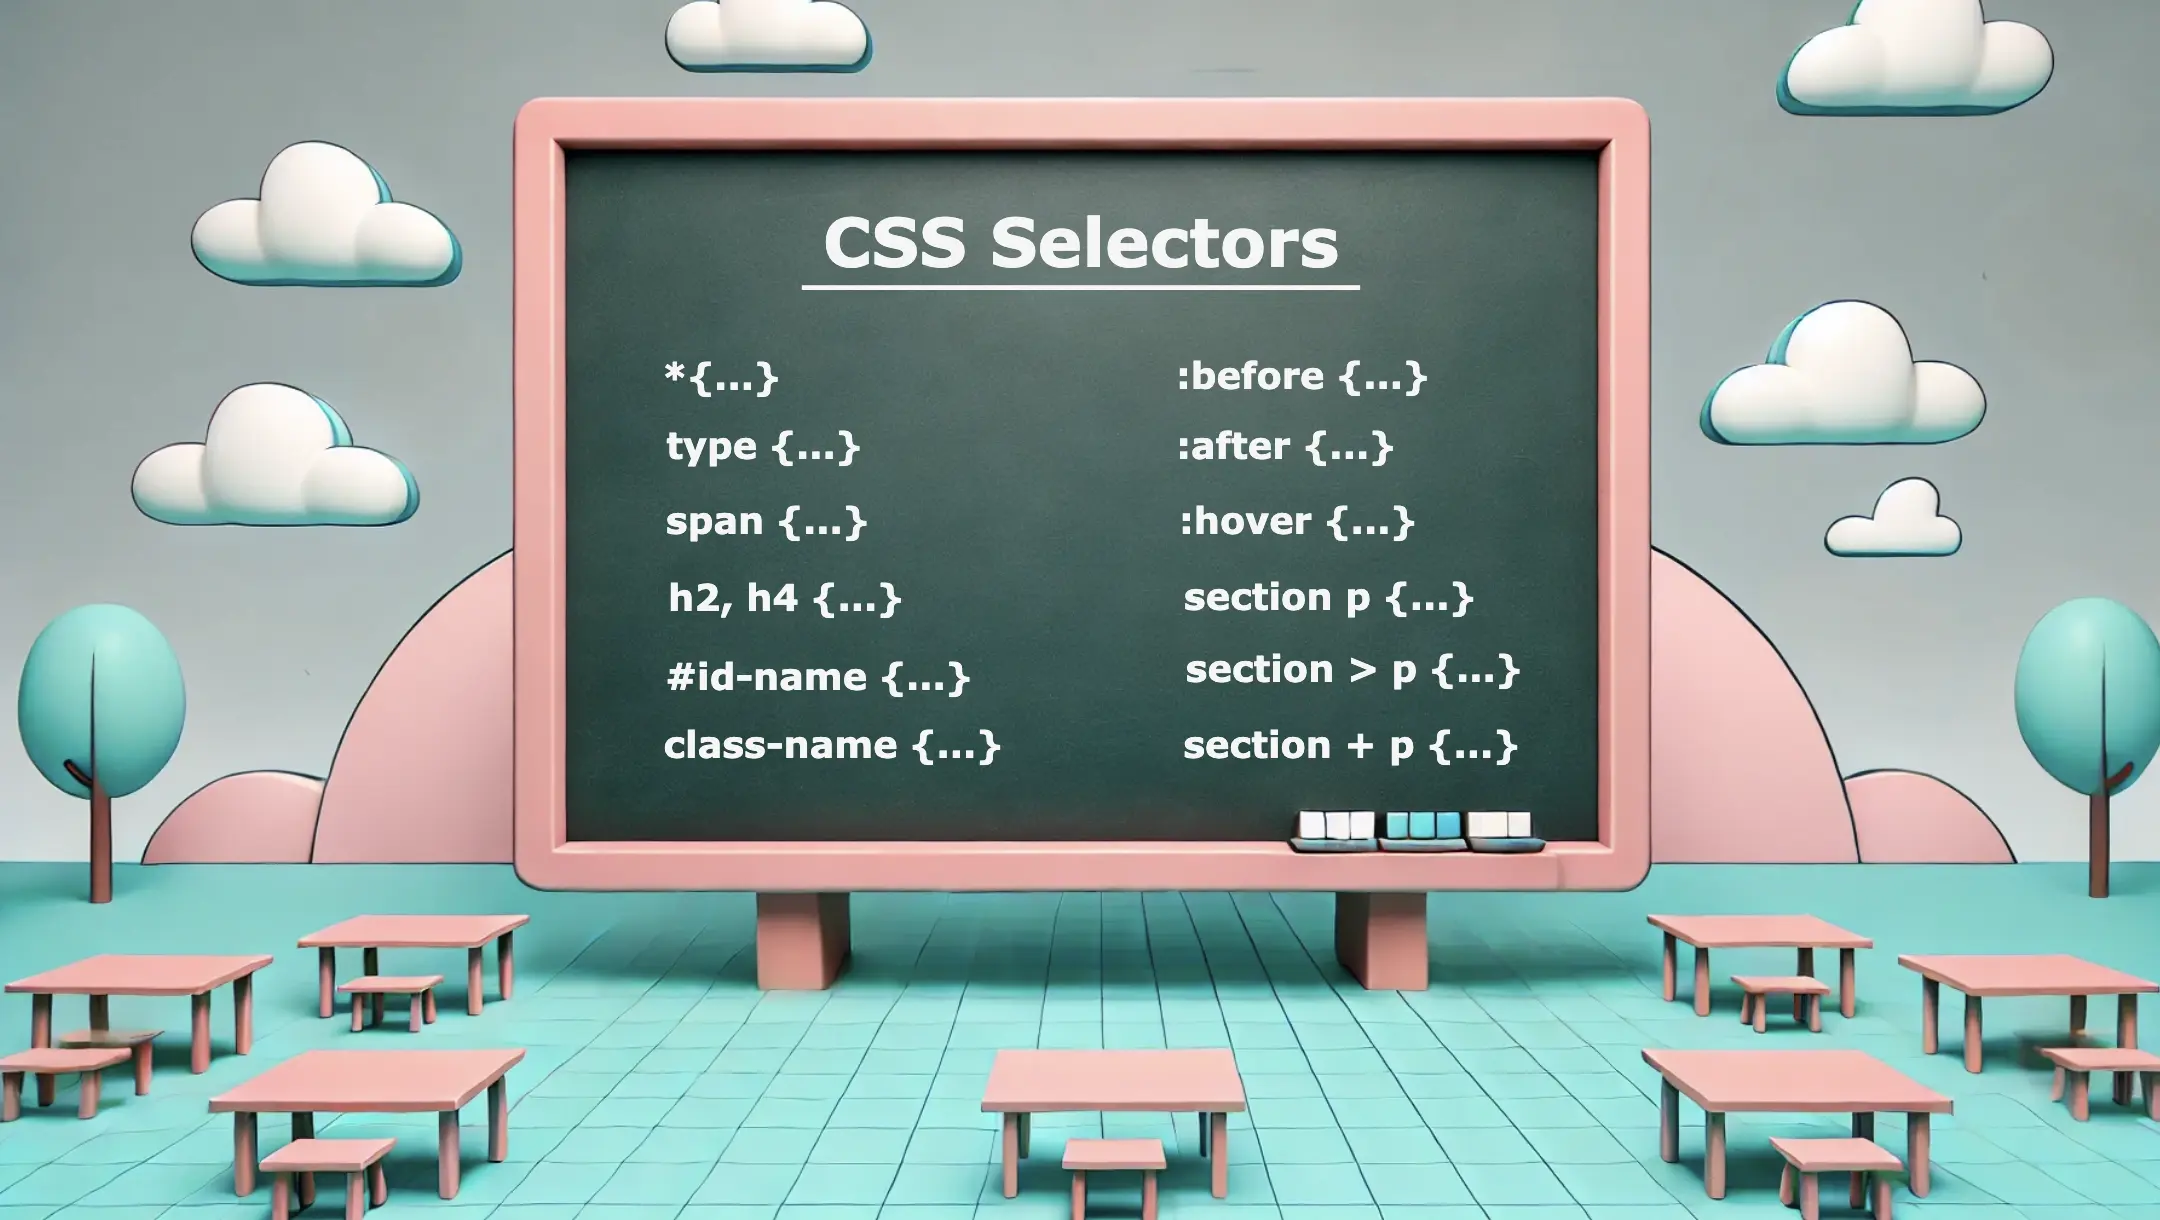
CSS selectors offer a wide range of options, from a basic element selection class, id, type, * to more advanced techniques when combining them. In addition, we have the pseudo-selectors :before, and :after which also apply styles but only to specific elements and then it is the :hover pseudo-selector which adds the hover effect. So, let’s continue and analyze them one by one!
Universal CSS Selector
We are able to select ALL elements by setting the asterisk * selector. We utilize the asterisk to seamlessly/harmoniously apply uniform styles across all elements on our page. Below we can see an example where the CSS selector * applies a padding of 10 pixels to all HTML elements on the page. This means that every element, such as headings, paragraphs, images, buttons, and more, will have a padding of 10 pixels on all sides, creating consistent spacing around each element.
* {
  padding: 10px;
}Basic CSS Selectors
Now, it’s time to continue with the basic CSS selectors.
class selector
The first one is when we select elements based on their class. In the following example, we set all elements with classname="custom-class" to have background-color: yellow.
.custom-class {
  background-color: yellow;
}id selector
We continue with the second selector where we pick out elements based on their id. In the example below, we set all elements with id="custom-id" to have background-color: yellow.
#custom-id {
  background-color: yellow;
}type selector
Finally, the third selector is when we target elements based on their type (e.g.: p, h3, div, etc…). The code to the coming example selects all p elements from our document. The rules background-color: yellow and font-size: 14px means that all paragraphs on our document will be displayed with this specified background color and font size.
p {
  background-color: yellow;
  font-size: 14px;
}You may also like 🎬

Combine CSS Selectors
We can further enhance CSS selectors by creating powerful combinations. Mixing and matching elements, make our selectors stronger and maintain our code super clean. 😄✨ The examples provided above show how adeptly combining CSS selectors can lead to remarkable outcomes.
Multiple selectors
We can begin with the power of CSS selectors in tailoring styles to a variety of HTML elements. Using the above code snippet we set the text color for h1 and h3 to magenta, while the text color for h2, h4 and p will be pink. All other elements (e.g.: h5, h6, div, a, etc…) will not be affected by these rules and will retain their default styling.
h1, h3 {
  color: magenta;
}

h2, h4, p {
  color: pink;
}Adjacent Sibling Selector (+)
We move forward with a slightly different example. Here, our code selects only the first p element that stands after every section element. So, here we will give a purple background-color to paragraphs that come immediately after sections. If there are paragraphs that follow other sections but are not direct siblings, they will not be affected by this specific rule.
section + p {
  background-color: purple;
}<section>
<p>This paragraph will NOT have a purple background.</p>
</section>
<p>This paragraph will have a purple background because it is immediately preceded by a section element.</p>
<section>
<p>This paragraph will NOT have a purple background.</p>
</section>
<p>This paragraph will have a purple background because it is immediately preceded by a section element.</p>
<p>This is an additional paragraph after the last 'p' element, and it will NOT have a purple background.</p>Direct children selector (>)
We continue by setting the following code which selects all the p elements but only when they are nested inside a section and only the direct children. So, here will give a purple background-color to all paragraphs p that are direct children of all section elements. Any other paragraphs inside nested elements or outside the section elements will not be affected by this specific rule.
section > p {
  background-color: purple;
}<section>
<p>This paragraph will be selected.</p>
<p>This paragraph will be selected.</p>
<div>
<p>This paragraph will NOT be selected.</p>
</div>
</section>
<p>This paragraph will NOT be selected</p>All descendants selector
Our last example selects all p elements inside section elements. So, here will give a purple background-color to all paragraphs p that are nested to section elements. Any other paragraphs outside the section elements will not be affected by this specific rule.
section p {
  background-color: purple;
}<section>
<p>This paragraph will be selected.</p>
<div>
<p>This paragraph will ALSO be selected.</p>
</div>
</section>
<p>This paragraph will NOT be selected</p>
<p>This paragraph will NOT be selected</p>🔎 🕵️♀️ 🔍 The main difference between 3 and 4 is that section > p selects all p elements that are direct children, of the section, while section p selects all p elements that are descendants of the section, no matter how deeply nested.
You may also like 🎬
Pseudo-selectors
Before and After
The :before and :after are not standalone selectors in CSS. They are pseudo-elements that can be used with regular CSS selectors to apply styles to specific parts of an element’s content. They are used in conjunction with regular selectors to add content before or/and after the selected elements and apply specific styles to that generated content.
Here we have an example using an h1 selector with :before and :after pseudo-selectors. Styles defined within h1:before will be applied to the content that appears before(left) the h1 element while styles defined within h1:after will be applied to the content that appears after(right) the h1 element.
h1:before {
  content: "🥰 😀"; /* the two faces will be placed before my heading(h1) */
  padding-right: 10px;
}

h1:after {
  content: "😀 🥰"; /* the two faces will be placed after my heading(h1) */
  padding-left: 10px;
}OR (using Sass)
h1 {
  &:before {
    content: "🥰 😀";
    padding-right: 10px;
  }
  &:after {
    content: "😀 🥰";
    padding-left: 10px;
  }
} /* end of h1 */🔖 We need to add padding-right and padding-left in order to give our pseudo-selectors a small space, in our case 10px, from our heading.
<h1>Pseudo-selectors are awesome!</h1>Ta-da 🥁 ! Below, we are able to view the current visual output displayed on the screen. Awesome! Isn’t it? ✨ 🎉

Hover
We use the :hover selector to change the style of an element when we hover over it. While it is commonly used with links it can also be applied to all elements. To implement this effect, first, select the element you want to target, in our case the <button>, and then apply the :hover pseudo-selector to it. After that, when we hover over the button, its color will change from pink to green.
button {
  background-color: pink;
}

button:hover {
  background-color: green;
}OR (using Sass)
button {
  background-color: pink;
  &:hover {
    background-color: green;
  }
}The CSS selectors play a fundamental role in web development, enabling us to target and style specific elements efficiently. They provide great flexibility and precision in styling web pages. Use them in the right way 🧐 and you will be able to do amazing things! Sending good vibes for your CSS explorations! Happy coding!!
🌼 Hope you found my post interesting and helpful. Thanks for being here! 🌼
